Monday, August 25, 2008

Combining My Garden & Ceramics Blogs


Here's one of the first vases I made so I could display some of the lavender I grow. To uncomplicate my life a bit and to have more time to devote to things I love, I've decided to combine my gardening and ceramic blogs. From now on if you want to know what's happening in my gardens, you'll have to tune in to my ceramics blog at Blue Starr Gallery You'll probably see more about ceramics than gardening, but since a lot of my ceramics inspiration comes from nature and my gardens, you'll be able to hear about my gardening adventures too. Hope to see you at Blue Starr Gallery.

Wednesday, August 13, 2008

Jelly Palm

jelly-palm-fruit-from-my-palm-tree-Butia-capitata-or-pindo-palmToday I harvested the first ripe fruits from my jelly palm, Butia capitata. The fruit should be harvested when it is completely soft and ripe. Picked too green and the fruit is astringent like the persimmon. The jelly palm is also known as the pindo palm. Although the fruit is small with a large seed, like the seeds of the loquat, the fruit is really delicious. I can only describe the fruit as a cross between pineapple, citrus and apricot with a touch of mango thrown in. As the name implies the fruit is used to make jelly but can also be eaten fresh. In Uruguay, the fruit is mashed and used to flavor a liquor. The seeds can also be ground as a substitute for coffee.

The jelly palm can grow to 20 feet, but usually only attains 12 feet or so. It has long curving palm leaves which are a silvery green color or blue green. I purchased my jelly palm four years ago as a 15 gallon sized plant at a local nursery. The palm produced fruit the second year. Now in its fourth year in the ground it is starting to show an actual trunk and is much larger. I'm looking forward to many visits to the palm in the next few weeks to harvest more of the delicious fruit.

Tuesday, August 5, 2008

Black Monukka Grapes & More Peaches

beautiful bunch of Black Monukka grapes growing on my vine at Springville Lavender Gardens
The Black Monukka Grapes are now ripe and boy are they good, so sweet, and seedless too. This year they aren't quite as big as last year. I was reading that if it is a dry winter, the grapes need to be irrigated even before they put on leaves and I think I was negligent with this, so I will have to remember that from now on. In fact, probably all plants need water in the winter if it doesn't rain. Sometimes when plants have dropped their leaves it's easy to forget they need water since their leaves don't show any signs of water stress.

By the way this grape photo is one of my very favorite photographs I have taken in my gardens. I just love the wonderful dusky color of the grapes, almost like a water color painting. All my photographs are copyrighted. If you wish to use any of my photos, please contact me through Springville Lavender Gardens.

Last year a gentleman to my gardens looked at the Black Monukka Grapes and said, "They are kind of small, aren't they?" I suggested he taste one. Then he said, "Those are unbelievably delicious, nothing like the ones in the grocery store!" We are so conditioned by the produce in the grocery store, big isn't always better when it comes to taste. Several visitors have told me about commercial growers girdling the trunk of the grape to get the grapes to grow bigger and wondered if I was going to do this. No, why should I? I have some wonderful grapes and they taste good, so why chance messing up a good thing.

huge Fay Elberta peach growing on my tree at Springville Lavender Gardens

More peaches are ripe too - Fay Elberta. Now these are really big this year - almost five inches long. This peach is a yellow freestone with fuzzy skin with a little red blush. The skin is thicker than the Red Haven peach skin. Last year I was talking to a commercial stone fruit farmer and he told me when the peaches get an inch in size to deep water them at least two times a week until you pick the fruit. This definitely has done the trick. When I got to thinking about it, it seems logical that all that fruit would need much more water than just a tree with leaves.

You might notice in the upper right hand corner of the peach photo, a metal hook attached to a stake. I prop my peach tree branches and other fruit branches when they get heavily laden with fruit. This prevents the branches from snapping off. If your tree has a lot of fruit, the branches can only support so much weight before they snap off. I'm speaking from experience here. This is really important and is especially true with peaches. Sometimes younger tree branches aren't strong enough yet or haven't obtained enough girth to support the amount of fruit they produce either. The stakes are about 8 feet in length and the metal hangers or hooks are movable up and down the stake depending upon the height of the branch you are trying to prop up. I got my stakes and hooks at the local Fruit Growers supply nearby.

Friday, July 18, 2008

Dehydrating Peaches

dehydrator
When one tree produces more than 300 peaches, you have to be creative on what to do with all of those peaches. I've dried or dehydrated tomatoes before and they were really good, so I thought I would try drying or dehydrating peaches. I got my dehydrator several years ago at a department store. I'm starting with about 16 medium sized peaches, juice from 4 limes, a small strainer, a mixing bowl filled with water, a cutting board, and a paring knife.

red haven peaches
The peaches should be ripe, but firm. I washed the peaches off, just to get the dust off. I don't use any pesticides, so there is no unwanted residue in that category. I slice the peach in half and remove the pit. Then I slice the peach in half again and holding the peach quarter in my right hand, I take my left thumb and peel off the skin. I am growing Red Haven peaches. These peaches are wonderful because not only do they taste good, they have little to no fuzz, the skin peels off readily, and they are freestone, which means the pit can be removed very easily from the fruit. Cling peaches don't do this, which makes it hard to remove the pits for canning, drying or freezing.

Persian limes
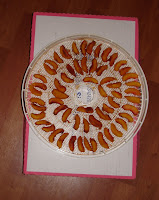
Pour the lime juice, or you can use lemon juice, in the mixing bowl with the water. If you don't have any lemons or limes, you can use ascorbic acid found in the canning section of your local grocery store. I happened to be at the 99 cent store the other day and got a whole bag of Persian limes for, yes, just 99 cents. Make sure the stainer is submerged in the water when it is placed over the bowl. Now take the pitted and peeled peaches and slice them again which means they are now cut into eighths. When you get two peaches pitted, peeled and cut up, place them in the strainer and submerge into the citrus water for no longer than 5 minutes. Soaking the peaches in the citrus water prevents them from oxidizing in the air, turning brown and helps retain the vitamins. After soaking the peaches for a short time, drain the water over the bowl, letting most of the water fall back into the mixing bowl (for the next batch of peaches). Now arrange these peaches in rows on your dehydrator rack close together, but not touching. You want to leave a little space between each peach slice so the air can circulate around and dry them out. Now go back to pitting, peeling and slicing two more peaches and so on till you get all of your dehydrator racks filled.

peaches on drying rack
Dehydrate on 135 F till dry. I put the peaches on at 11 am. You'll have to wait to see how long it takes them to dry. I also want check the electric meter to see how much energy dehydrating takes. The amount of time to dehydrate will vary depending upon the variety of the peach, how ripe and juicy it is, and the brand of dehydrator utilized. To be continued...

Saturday, July 12, 2008

Judy's Block Bins & Curried Okra

block bins with rice hull compost
Today I went to visit my friend Judy to see her new method of growing vegetables. Judy read about building raised block bins and using rice hulls to amend the soil. Judy says her vegetables are twice as big as they were last year and attributes their health and size to using the rice hulls. That's the light colored stuff you see in the soil. Judy constructed the bins by stacking the block and overlapping the seams. It wasn't necessary to use any mortar as the block is strong enough to hold back the soil.

okra growing in block bins
Judy's also has bent PVC pipe and inserted each end in the block. She uses the PVC pipe to place plastic over the bins if a frost is threatened or can put up some shade cloth if the weather gets too hot. I could even see some vines climbing up the PVC pipe.

wood raised vegetable bin with potatoes
Here's Judy's potato bin. She ran out of block, so she built this one out of wood. The beauty of a raised bin with rice hull, lightened soil, is digging for the potatoes is going to be super easy.

Judy made some scrumptious lunch too and the main course was curried okra, um um good! That's Judy's okra patch shown in the second photo. As the summer winds on, Judy said the okra gets over 6 feet tall and keep producing. We also had rice, summer squash and I brought some of my minted eggplant. Lunch was like dinner. I never eat that much for lunch, but I recalled visiting my grandmother in Arkansas when I was a child and remembered we always had a big meal for a late lunch and then something light for dinner.

Here's Judy's Curried Okra recipe: 1 pound young okra pods, stem-end cut off and discarded, chopped into 1/2 inch sections. Begin stir frying okra over medium heat in a little olive oil, stirring frequently. After about 10 minutes, add 1 red onion, finely chopped, and 1/4 tsp cayenne, 1/2 tsp curry powder, 1/4 tsp ground turmeric, salt and pepper to taste. Stir fry another 5 minutes, until onions are soft. Serve hot as a vegetable side dish, a main dish, or cold on bread as a sandwich. Even if you don't like okra, this is one recipe you have got to try, it is simply delicious.

Thank you Judy, for a wonderful visit and a super lunch.

Thursday, July 10, 2008

No Sign In To Make Comments !

You can now make comments on my blog without signing in. I have updated my blog comment section, changing the requirements to make comments so anyone can make comments. Several people mentioned they can't remember sign in names and since our world is so busy I am hopefully making life a little easier for you.

Another online blog recommended not requiring a sign in on blogs to increase blog comments. So in the interest of sharing and increasing comments, which is why I started this blog in the first place, I am putting myself out there. If you wanted to make a comment about a previous post, but decided not to because of the sign in hindrance, please do so now. I'd love to hear from you.

I hope I'm not deluged with a ton of spam.

Monday, July 7, 2008

Minted Eggplant

beautiful eggplant I grew
I found three ripe eggplant this morning. I've grown eggplant before, but my plants never did that well. At this location they seem to do well. I think they are getting the heat and humidity they need to thrive. Eggplant is one of those vegetables that takes on the flavors you add to it. Most people have heard about Eggplant Parmesan, but have you heard of Minted Eggplant? Well, here's the quick and easy recipe, perfect for a hot summer day.

2-3 large eggplant
4 tablespoons of minced garlic
1 cup very finely chopped mint leaves
juice from 5 limes

Slice eggplant about half an inch thick,
leaving the skins on. Steam eggplant
in a vegetable steamer till just tender,
but not falling apart. About 12 minutes.
Quickly remove eggplant and immerse
in an ice water bath to stop cooking process.
Drain eggplant well. Put one layer of
eggplant in the bottom of a casserole dish,
layer with minced garlic and finely chopped
mint leaves, making sure you get some mint
and garlic on each eggplant slice.
Continue with another layer until
you run out of eggplant.
Drizzle with fresh lime juice
over the entire casserole.
Let marinate for about two hours.
Serve room temperature or slightly chilled.
Very refreshing.